


We live in an age where uploading a post to a website should be simple, but alas, the process of uploading to WordPress is still somewhat of a burden. The good news is, with the right information, and a bit of practice, uploading a post to WordPress can be relatively quick and painless.
But why can’t I upload to WordPress directly from Google Docs?
Google Docs is one of the most popular word processors for content writing, so you’d think it would be pretty straightforward. But getting written content from Docs to WordPress isn’t as simple as copy-pasting. Doing so will generally result in dirty code (which we’ll discuss later) on your webpage.
Instead, we must make use of Microsoft Word or Apple Pages to get ou
r content from Google Docs to WordPress.
Microsoft Word is the preferred word processor for this procedure, as it has built-in compatibility with WordPress, which allows for the preservation of a document’s formatting when copying across. Apple Pages does work as well, but it may require a little extra formatting during the upload procedure.
Below, you’ll find a comprehensive guide that details the process of uploading to WordPress from Google Docs.
Step 1 – Download
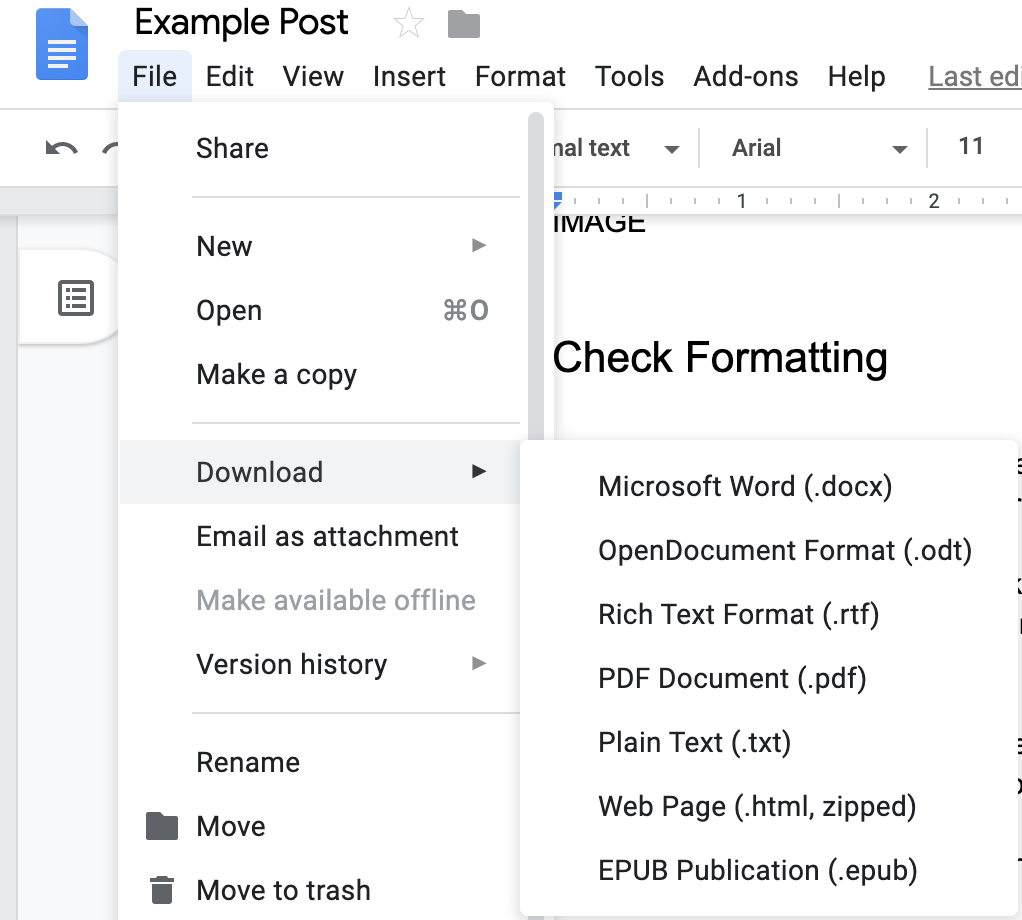
The first step is to download the file from Google Docs as a Microsoft Word file (.docx) (this file will also open in Apple Pages, so don’t panic if you have a Mac).
In order to do so, navigate to the ‘File’ tab in the menu bar at the top. Hover over the ‘Download’ option and a sub-menu will emerge to the right. Click ‘Microsoft Word (.docx)’. The file will download to your hard drive.
Step 2 – Open in Pages or Word
Next, you’ll need to open the downloaded file either using Microsoft Word, or Apple Pages.
Once open, check that the formatting (headings, bold, italics, spacing, layout, etc.) has remained the same. If it has, you can move onto the next step. If it hasn’t, correct it in Word or Pages before moving on.
Step 3 – Create a New Post on WordPress
Head over to the website where you’ll be uploading the post, and log in to WordPress. You can do so by adding the following to the end of the URL of the site’s homepage in your address bar:
/wp-admin
Log in using your username and password, and you’ll arrive at your WordPress dashboard.
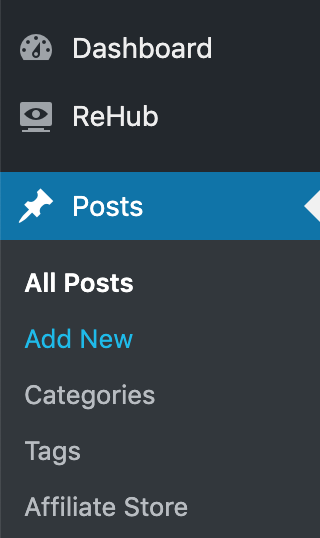
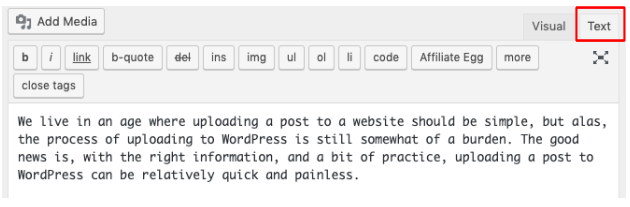
Click on the ‘Posts’ tab and then select ‘Add New’. This will bring up a fresh, new WordPress post.
Step 4 – Copy & Paste
Next, select and copy the title of your post from Word or Pages and paste it into the title box on WordPress.

Then select and copy the rest of your post from Word / Pages and paste it in the ‘Paragraph’ box on WordPress. Your images won’t copy across, but don’t worry, we’ll get to the matter of images later in this post.
Hit the ‘Save Draft’ button to save your progress up to this point.
Step 5 – Check Formatting
The formatting of your document is effectively the visual appearance and properties, including bold, italics, alignment (center, left, right), spaces, font size, headings, etc.
Microsoft word and WordPress work together to preserve formatting, but occasionally formatting doesn’t carry across correctly. Generally, when copying from Apple Pages, most of the formatting is preserved, but headings don’t seem to be.
So, you’ll need to look through the text on WordPress and check whether your formatting was preserved. If any formatting wasn’t preserved, you’ll have to apply it again on WordPress.
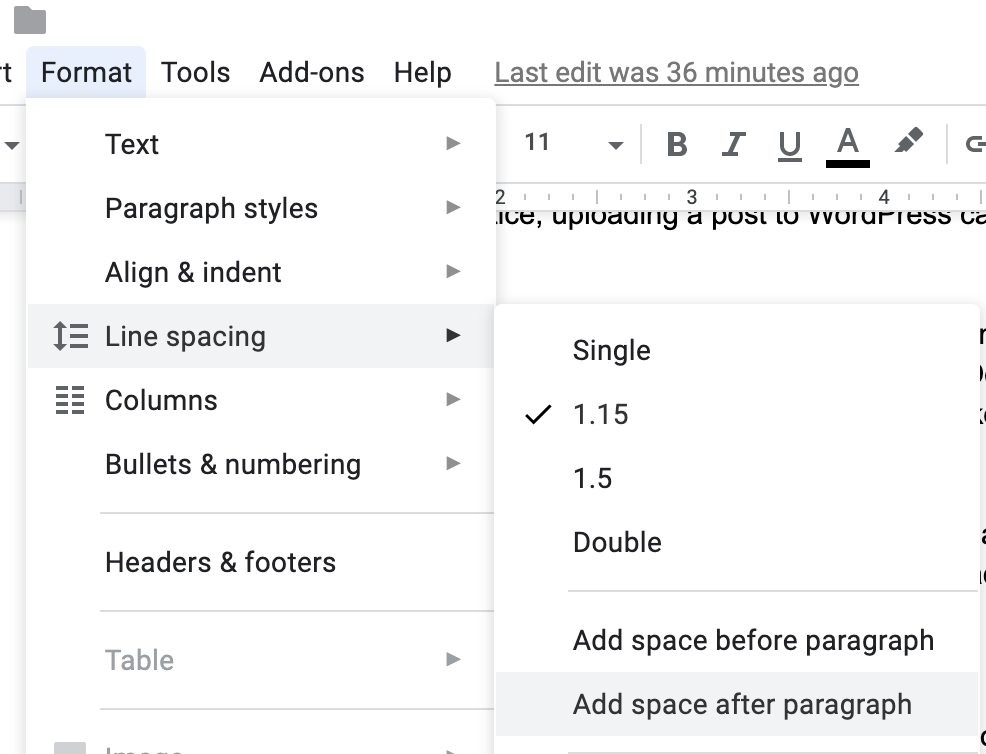
Tip: Before you start writing on Google Docs, set the document format to ‘Add space after paragraph’. Doing so will avoid you having to delete additional spaces in WordPress once you’ve copied your text across.
Step 6 – Remove any Dirty Code
Dirty code is any code that is present in your post, that doesn’t need to be / shouldn’t be there. Most of the time, you can’t see the effects of dirty code on the visual editor, so you have to dive into the WordPress Text Editor in order to find and delete it.
In the Text Editor, headings will have code on either side to signal their formatting. E.g. H1s should appear:
<h1>Yourheadinghere</h1>
The <h1> (opening tag) signals the start of the heading, while the </h1> (closing tag) signals the end. The same is the case for all other headings (<h2>, <h3>, etc). Every opening tag will have a corresponding closing tag with a “/” in it (eg </h2>).
Paragraph text can also be bordered on either side by a similar set of tags: <p> and </p>. However, paragraphs don’t need to have this code, as any text not bordered by formating code defaults to paragraph text. Also be aware of code for other formatting such as bold (<strong> </strong>) and italics (<em> </em>).
You’ll also find that hyperlinks are accompanied by code, that looks something like this:
<a href=”https://websitename.com“>your anchor text</a>
Outside of these examples, it’s unlikely you’ll have other useful code in your post. Any other code can usually be deleted.
Note: Images also have their own code, so if you’ve already uploaded images, make sure you recognize where they’re placed and don’t delete their code.
Some common examples of dirty code include:
- <span> </span> – this is used to group styles on a portion of text. This is done automatically in WordPress (bold, italics, etc.) so anything relating to this is probably ‘dirty code’.
- <div> </div> – these are HTML markers used mainly for separating sections of a page. Since your text is formatted into one block, there’s no need for div elements on your page.
We could list a number of examples, but that wouldn’t nearly cover everything. The bottom line is, any code that you remove that doesn’t affect the formatting of your text when you return to the visual editor can be considered dirty code.
Step 7 – Make Links Nofollow and Open in New Tab
Once you’ve cleaned up any dirty code, go back to the visual editor.
It’s likely that you’ll have at least a few internal and external links in your post (and if you don’t, we’d highly recommend that you add some). We need to make sure that any affiliate or paid links are set to ‘nofollow’ and ‘Open in new tab’. This will help keep users on your page and help with SEO.
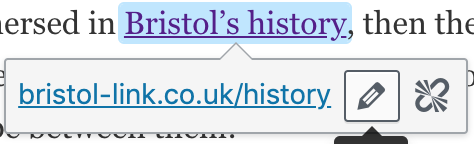
In order to do it, head over to one of your links (in the visual editor) and click on it. A little box will pop up with the link address and two small buttons. Hit the button with the pencil on it (if you hover your mouse over it, it’ll say ‘Edit’).

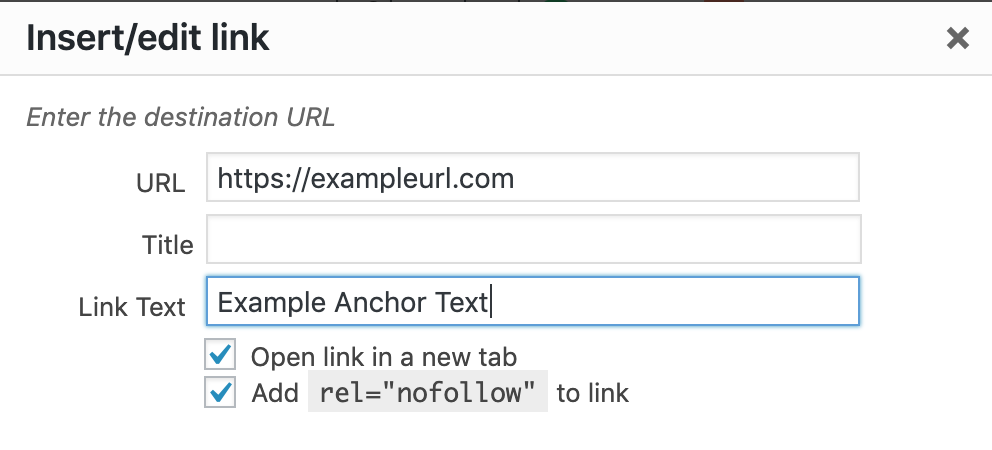
Then hit the little cog button (link options) that appears next. A dialogue box will pop up. Here, you can check the boxes that say ‘nofollow’ and ‘open link in a new tab’. Some WordPress themes/versions don’t include the option to add ‘nofollow’ to your links, so you may need to install a plugin.
Repeat this process for each of the links in your post.
Step 8 – Add a Meta Description
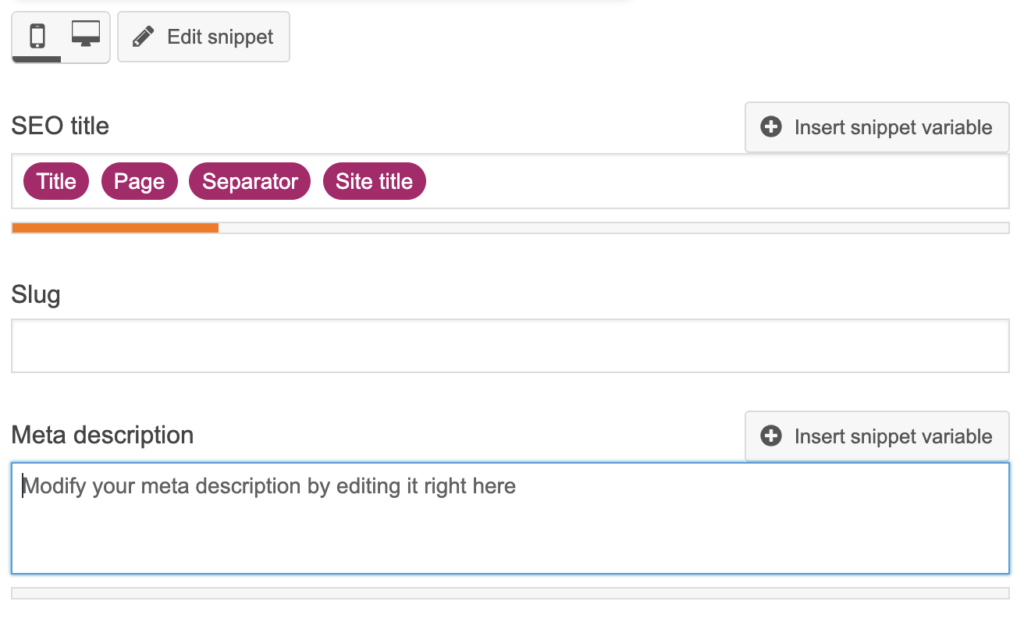
Meta descriptions are no longer as essential as they once were; Google does a good job of summarising posts and usually auto-generates a meta description. However, it’s still SEO best practice to add a meta description of between 50 and 160 characters. You can do this using Yoast (a free WordPress plugin for SEO).
Step 9 – Add Images
As mentioned previously, images that are in your document don’t copy across to WordPress – you’ll have to add them separately.
It’s best practice when finding images for your post, to create a folder where you can store them. This can be a Google Drive folder or a folder stored locally on your hard drive. In order to upload images to WordPress, though, you’ll need to have them stored on your computer.
Hit the ‘Add Media’ button just above the toolbar – this will bring up a popup window showing all of the previously uploaded files. Click the ‘Upload Files’ tab in the top left-hand corner of the window.
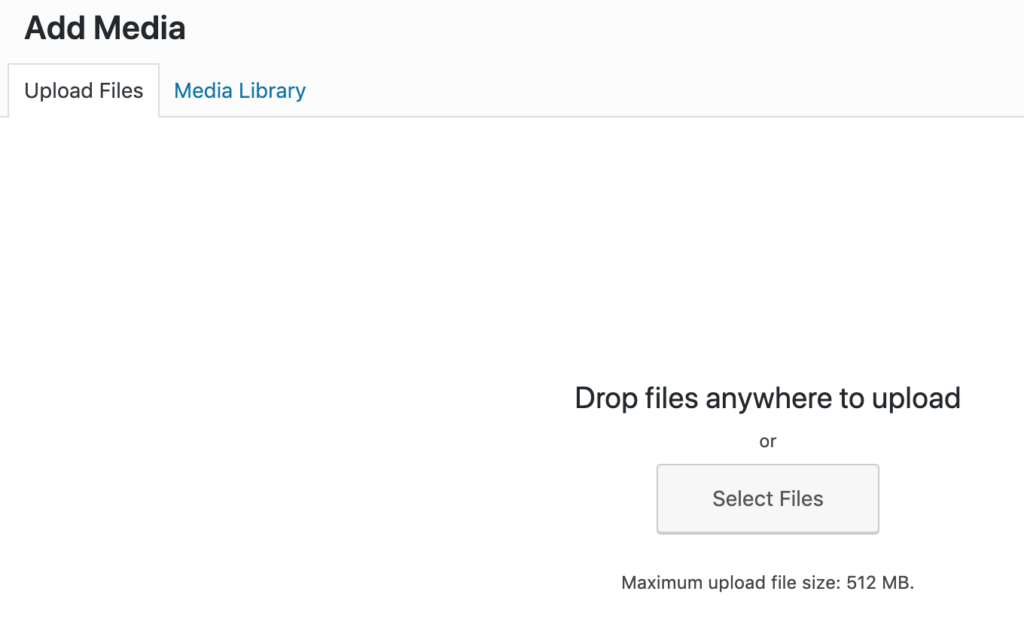
You can either drag and drop all of the images into the window or hit ‘Select Files’ and find the pictures on your computer. Make sure you select all of the relevant images so you don’t have to upload more than once.
Next, go through your Google Doc or Word document and check where you had placed your images in your post. Go to your post on WordPress, place your cursor where you want your first image, and hit the ‘Add Media’ button again.
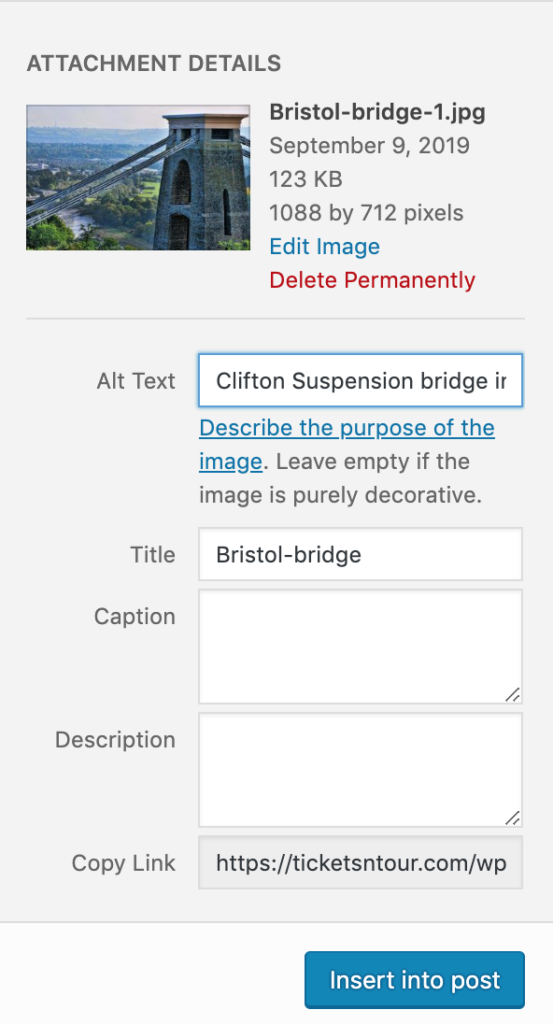
You should now be able to see the images you uploaded (though you may have to wait until they have all uploaded fully). Select the image you want to insert, add a bit of descriptive alt text, and hit the ‘Insert into post’ button.
Repeat the process for each image.
Step 10 – Check and Adjust URL
Once all of the images have been inserted, your post is pretty much ready to upload. The last step is to ensure that your URL is as you want it.
It is SEO best practice to make sure your URL is exactly the same as your main keyword string (though, naturally there will be a dash between each word, which is absolutely fine).
You should also remove numbers and years from your URL if there are any. These can be subject to change, and if you do choose to update the post at some point, you’ll have to redirect the old version of the URL to the new one (which is best avoided).
Edit your URL to reflect your main keyword, before moving on to the next step.
Step 11 – Publish
Now it’s time to publish your post. All you have to do is hit the blue ‘Publish’ button on the right-hand side. Once the page has reloaded, click on your newly created URL, and you’ll be taken to the live page.
Check the page thoroughly for any errors or formatting issues, as sometimes these only become apparent after publishing.
Make any tweaks and adjustments that are necessary, and when you’re confident that all is in order, you’re done!

Matt is a travel entrepreneur with over a decade of experience across digital marketing, operations, and asset investment. His ventures include founding the agency Travel Tractions, successfully buying and selling multiple travel websites, and owning a boutique hotel in his home base of Cape Town. His writing focuses on the intersection of data-driven marketing and real-world business growth in the tourism sector.